Introduction Link to heading
This post contains two parts:
- A brief history of previous media servers I’ve built, to give requirements and expectations some context.
- A short review of the two main solutions I looked at this time around, i.e. Jellyfin and LibreELEC/Kodi.
It can be read in conjunction with Extracting multichannel audio files from DVDs and SACDs.
Part One: History and context Link to heading
The multichannel and lossless audio saga Link to heading
Towards the end of 2001, I bought myself the Tubular Bells SACD1 for my birthday. That is a multichannel SACD version of the original quadrophonic release from 1975. The trouble was, I had no way of playing the multichannel version (or even the stereo SACD version for that matter)2. It did, however, give me an excellent excuse to buy a SACD player. So I bought myself a SACD player for Christmas (actually a late Christmas present because I waited until the January sales). I also bought a Denon receiver to plug it into. And a really nice set of B&W front, centre and rear speakers.
All was good for a while. Then in 2003 I got a 3rd gen iPod. I spent the best part of a year ripping nearly 600 CDs with Exact Audio Copy, so I could listen to all my music on the go. Fortunately I ripped to a lossless format3, and transcoded to mp3 for the iPod, to make sure that such a time consuming activity would be a once-in-a-lifetime operation. It is hard to appreciate nowadays how exciting it was to be able to listen to all this music on one portable device.
Now I had all these lossless audio files (which I wasn’t listening to because the iPod was loaded with the mp3 versions), and a really nice receiver and set of speakers, I thought it would be great if I could listen to the lossless audio files at home. The problem was that, when you switched them on, most home computers at the time sounded like an aeroplane taking off, which somewhat spoiled the hi-fi listening experience. So off I went down the silent PC rabbit hole.
Slient PC cases Link to heading
I started out with the Zalman Reserator 1 (not the 1 Plus or 1 V2 or the 2, but the original 1) in May 2004:
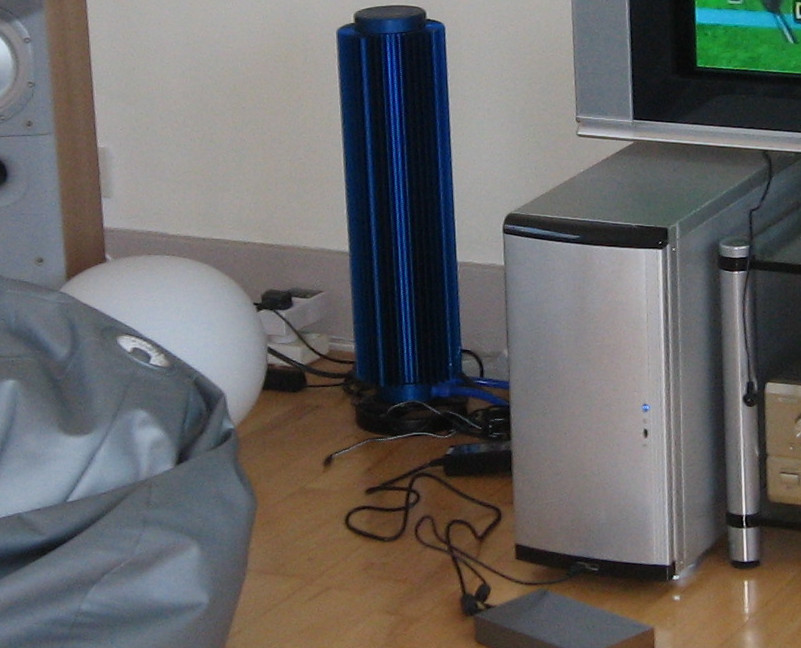
It was near silent, apart from a slight rattle of the flow meter and the pump deep inside the water reservoir. Unfortunately, plugging and unplugging the water supply did require some basic plumbing knowledge, or at least elementary physics (i.e. if there’s an opening anywhere below the water level then the water will start to escape through that opening), and I managed to flood my living room during some routine maintenance.
A few years later, in April 2006, I got the Zalman TNN 500AF:
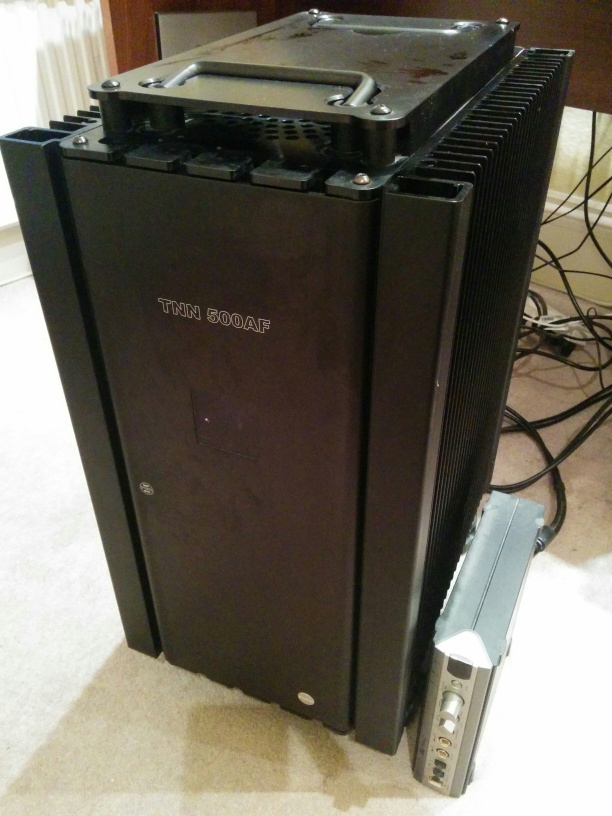
It was a hefty £760 including delivery, but was an awesome piece of kit. The whole case was a giant heatsink, weighing 32kg, supported by four heavy duty castors supposedly able to support one ton each, and all the main heat-producing components were connected to the case via heat-pipes. I moved home 3 times with it, and the removals people were always curious as to what was in the unbelievably heavy box. I sold it more than 9 years later (in November 2015) for £200, and the person who bought it drove a 400 mile round trip just to pick it up, which does give an idea of how special it was.
Dedicated media servers using MythTV Link to heading
I used MythTV at first. I did try a few different media server platforms, but they all seemed to be missing key functionality, e.g. Kodi (or XBMC as it was at the time) still needed MythTV for the TV. It was a bit of a lengthy process to get it all set up, especially when doing things like programming the infra red remote control, although the MythTV Ubuntu Installation Guide was helpful especially for UK TV tuning information.
But, once fully working, it was great, with features like DTS and AC3 (Dolby Digital) passthrough to the receiver, and playing the ISO files I’d made of my DVDs retaining menus and all.
DNLA media server using Rygel Link to heading
Things began to change in March 2015, when I got my first 4K TV, along with a new Blu-ray player (which could still play SACDs) and Denon receiver both with 4K (HDMI 2.0) support. Unfortunately the media server didn’t support 4K very well. The new TV was on the network, and had a media browser (using DNLA), so I thought I’d try using my main desktop PC as a simple media server (using Rygel), rather than having a dedicated 2nd machine plugged directly into the receiver and TV.
It did work reasonably well. The main issues were that we had to:
- Use the TV’s interface to watch TV. That was okayish for streaming, although meant you couldn’t pause or record live TV like you could with MythTV. The allegedly smart TV interface is a bit slow and unresponsive as well, e.g. it takes 7 seconds from it switching the sound on to it allowing you to change the sound volume, which can be a bit annoying4.
- Transcode many video files prior to watching them, since Rygel didn’t transcode on the fly, and the TV only supported certain codecs. It also meant I had to extract the film files from the DVD ISOs, and couldn’t watch the DVDs with menus etc. intact.
Back to the multichannel and lossless audio saga Link to heading
We got used to those limitations, and lived with them for many years. However, earlier this year (2022), things came full circle, when I wanted to listen to multichannel audio through the hi-fi for the first time in many years. I tried a number of approaches, but to cut a long story short, it turns out it was impossible with my current setup (unless of course I was to put a physical disc into a physical player): Denon receivers will not play multichannel audio via network devices (or even devices plugged in via USB for that matter), and it sounds like this is a general “feature” across other brands of receiver too for some reason. It wasn’t even something that could be used as an excuse to buy some new equipment, because even the latest models have that limitation (see e.g. the Denon AVRX1700H manual). The only way to play back multi-channel audio is to physically plug in a device which outputs it over HDMI, SPDIF or the separate channels plugged into the receiver’s multichannel input.
This triggered a quest to build a new media server.
Part Two: Evaluating options Link to heading
Requirements Link to heading
Based on the above history, my must-have requirements were:
- HDMI audio pass through for AC3 and DTS, i.e. just send the raw data and have all the digital to analogue signal decoding performed on the hi-fi receiver connected to the hi-fi speakers.
- A “ten foot interface” (as MythTV calls it), so it can be driven from my sofa.
- Low cost. I’d clearly spent a lot of money on equipment over the years, and with new responsibilities as a parent and so on “I” decided I didn’t want to buy a new TV or any significant new pieces of hardware. I already have a really nice receiver and speaker system, and the reality is that nowadays I just don’t have the time to use it enough to justify spending more money. I also keep on reading stories about the newer smart TVs getting worse, even to the point of injecting adverts into the interface, which doesn’t fill me with enthusiasm for purchasing a new TV either.
Nice to have requirements:
- HDMI audio pass through for DSD, so I can play my ripped SACDs (both of them:-)5.
- TV playback. So that the “smart TV” really would become just a dumb screen. Being able to pause and record live TV, like in the MythTV days, would be good, although nowadays family members only really watch live TV when they can’t decide what they want to watch, or when the internet is down.
- IR remote control interface, to save having to have wireless keyboards or whatever lying around.
Don’t need:
- Real-time video transcoding. All the videos have already been transcoded to work with my TV.
Hardware choice: Raspberry Pi 4 Link to heading
The Raspberry Pi 4 fitted the bill on the hardware side. It is relatively low power, and is said to struggle with real-time video transcoding, but as per above that wasn’t a requirement. They seem to be a bit difficult to find at the moment, but I was lucky to get a Raspberry Pi 4 B 4Gb kit for £91.50 inc P&P:
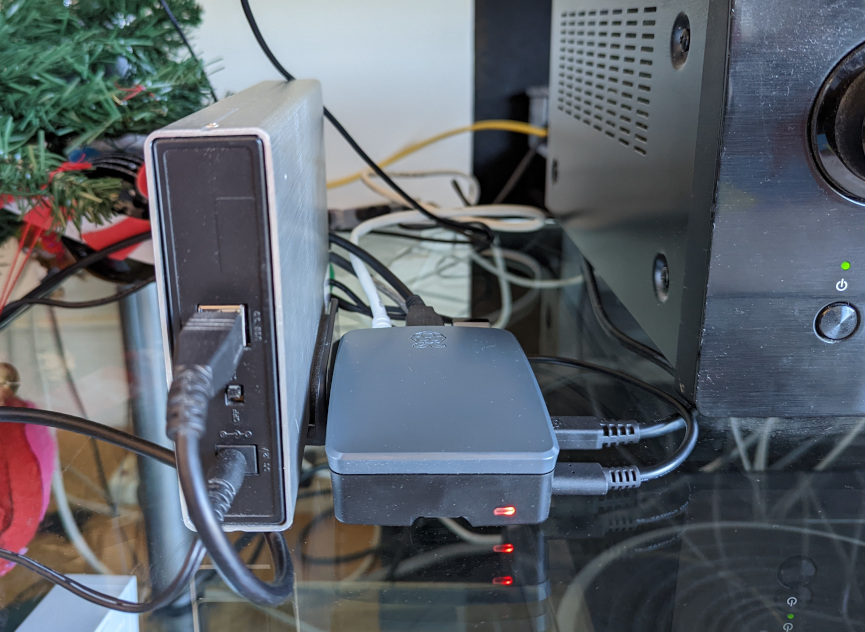
I still have an old TV tuner USB stick with a remote control from my MythTV days, and backup all the media from my main desktop PC to an external drive via rsync, so the plan was to use these with the Raspberry Pi (along with an old keyboard and mouse for initial setup).
Testing Jellyfin Link to heading
I really wanted to try Jellyfin because a lot of people seem to have been posting about how great it is recently.
Installing Jellyfin server Link to heading
I thought I’d install Jellyfin on Ubuntu because that is what I used for MythTV, so the first step was to install Ubuntu. This was as per https://ubuntu.com/tutorials/how-to-install-ubuntu-desktop-on-raspberry-pi-4, i.e. use rpi-imager to prepare the microSD card, put the microSD card in the Raspberry Pi, plug everything together and switch on, and follow on-screen instructions.
Second step was to install Jellyfin server. Again the process was quite straight-forward, simply following the instructions at https://jellyfin.org/docs/general/administration/installing#ubuntu.
Configuring the server was simple, and I really liked the web interface that allowed me to rescan and see the rescan progress.
Installing Jellyfin client Link to heading
For the client, apparently there’s a way of installing a Jellyfin app on a Samsung TV, but mine is a pre-Tizen Samsung TV so that wasn’t an option. My idea then was to install the Jellyfin Media Player client on the Jellyfin server, and use the remote control to interact with the client. This is where the difficulties began.
The actual installation process wasn’t too difficult. It uses FlatPak which I hadn’t used before, so I had to install that first.
Unfortunately, the client kept crashing on my 4K display due to resource issues. I reconfigured to boot into HD 1080, but even then it really struggled to play HD 1080 videos. I tried a few things to improve the situation:
- Increased the memory allocated to the GPU to 320M, by adding the line gpu_mem=320 to config.txt (which is at
/boot/firmware/config.txtfor Ubuntu rather than/boot/config.txton the Raspberry Pi OS). - Enabled hardware acceleration using Video4Linux2(V4L2).
- Disabled on-the-fly transcoding. To do this, I had to go into each user profile (Server / Users / user / Media playback) and disable all but Allow media playback.
Even with these changes, HD 1080 was still not watchable. I think the root of the issue is that (i) the client is a .Net app with a WebBrowser control and a lot of JavaScript, so it is pretty heavy-weight and resource intensive, (ii) the mvp it uses for playback has no form of hardware acceleration for the Raspberry Pi at the moment.
I decided to shift focus to getting the remote control to drive the client, but the interface is designed for mouse clicks or fingers on a touch screen rather than a cursor that could be controlled by a keyboard or IR remote control, so I didn’t get very far with the remote control configuration. I also tried to get the audio passthrough setup, but there doesn’t appear to be any configuration for that, and looking on the forums it seems it is not the sort of feature typical Jellyfin users request.
Testing LibreELEC Link to heading
The next option I tried was LibreELEC.
Installing LibreELEC Link to heading
Installation was unbelievably easy - just use rpi-imager to prepare the microSD card, put the microSD card in the Raspberry Pi, switch it on, and start configuring Kodi.
It is a stripped down OS, and has hardware acceleration for the Raspberry Pi, so with no special configuration it boots into 4K and plays HD 1080 videos okay. I was also able to enable DTS and AC3 passthrough with a simple configuration.
Fixing incorrectly identified films Link to heading
As with Jellyfin, there were a few incorrectly identified films, e.g. there are two films from 2019 called “Beats”, and both Jellyfin and LibreELEC incorrectly guessed that I had the one set in America, whereas I actually have the one set in Scotland. The solution was to create a .nfo file containing the IMBD link in the same location and with the same name as the video file.
Configuring the remote control Link to heading
It didn’t take long to get the old TV tuner’s IR receiver working following the instructions at https://wiki.libreelec.tv/configuration/ir-remotes. Unfortunately the IR receiver with the TV tuner only works with the supplied remote, but I thought it would be a good idea to use the TV remote to cut down on the number of remotes in use, so I spent another £20 on the Flirc universal IR receiver. Had a bit of a false start following out-of-date instructions from https://support.flirc.tv/hc/en-us , but eventually got to the current instructions at https://flirc.com/ubuntu-software-installation-guide. I then realised it was a bad idea to use the TV remote because the TV was still on and some buttons like volume and menu were operating both devices, so I settled on using the Blu-ray remote.
Setting up TV Link to heading
For a time I suspected I might have to get a second Raspberry Pi and install a MythTV server on that, but then I found you can install the Tvheadend Server on the LibreELEC box (via Add-ons / Install from repository / LibreELEC Add-ons / Services).
Tvheadend Server is confiured via a web browser on another machine, pointing to port 9981 on the Tvheadend Server IP address. From my MythTV days I knew I had to use the “28.2E:Astra” pre-defined mux, and fortunately I didn’t need to enter any other more advanced satellite configuration such as Polarity, FEC and Modulation. At first I thought it hadn’t worked, but that was because I was being impatient, and it takes a while for the programme data to load.
I was also able to setup pausing live TV (via Configuration / Recording / Timeshift, selecting Enabled).
Comparing Jellyfin and LibreELEC Link to heading
For my use-case, I got a lot further with LibreELEC in a few minutes than I got with Jellyfin in a few days. Rather than a failing of Jellyfin though, I just don’t think it is for my use-case. I guess I should have done a bit more research in advance, rather than jumping right in. Anyway, here’s a quick summary of where I think each should be used.
Jellyfin use-case:
- A software media server, e.g. a Rygel replacement, accessed via DNLA or via a dedicated app on a high spec phone or tablet or reasonably new smart TV.
Jellyfin strengths:
- Great UI for managing your media collection.
LibreELEC use-case:
- Full end-to-end media server, for direct connection to a hi-fi receiver (with out-of-the-box support for AC3 and DTS audio HDMI passthrough) and not-necessarily-smart display/monitor, and a UI designed to be used via a remote control or keyboard.
LibreELEC strengths:
- Really easy to setup on, and optimised for, the Raspberry Pi.
Conclusion Link to heading
So I can finally listen to multichannel audio on my hi-fi system once more! Nice. As an aside, while the multichannel SACDs I have are breathtakingly good, the multi-channel mixes I have on DVDs are lacklustre at best and disappointing at worst. I don’t know if that is a limitation of the format, or my setup, or simply the limited selection I have.
I can also watch films again with the multichannel soundtrack (I did have SPDIF from the TV to the reveiver but never used it), and also have the TV working (although it does seem to be a bit intermittent at times, possibly a resource constraint, so the children want to continue using the TV).
What about the Children Acceptance Factor? Unfortunately they seem to think it was a lot of effort to go to in order to save having to put one of a handful of physical discs into a physical player, so I think I still need to do a bit more work to convince them of the benefits of the new system:-)
-
It cost £17.73 in 2001, which according to https://www.bankofengland.co.uk/monetary-policy/inflation/inflation-calculator would be the equivalent of around £30 in Oct 2022. ↩︎
-
As an aside, I started buying CDs in July 1989, more than a full year before I bought my first CD player. I called it “future proofing”. ↩︎
-
Initially Monkey’s Audio, but when I migrated to Linux full-time I cross-converted to FLAC. ↩︎
-
The lengthy delay between playing sound and being able to control the volume of the sound is a particular bugbear. The children often watch TV quite loud during the day, and if I want to watch something after they’re in bed I sometimes risk having children’s TV blaring out at wake-them-up volume for 7 seconds before I can turn it down, or worse still if I don’t turn it down at night they often start watching TV early in the morning while I’m still asleep and there’s many a time I’ve been woken up by 7 seconds of loud TV before they can turn the volume down. ↩︎
-
I bought a second multi-channel SACD in Apr 2003, this time Dark Side of the Moon. ↩︎